Thin-wall castings fail on standard coated sand line settings. The shell cracks during ejection, sand inclusions show up after pouring, or the metal doesn't fill completely because the shell collapsed under thermal shock. A 500-piece run becomes 380 good parts and 120 scrap — that's 24% reject rate eating your margin before the castings even leave the shakeout line.
The problem isn't your sand quality or your pattern design. It's that coated sand production lines ship with parameter sets optimized for 8-12mm wall sections. When you drop below 5mm wall thickness, those same settings produce shells that are either too thick (restricting metal flow) or too weak (cracking under pouring stress). Most foundries discover this after they've already committed to a thin-wall job and are scrambling to adjust parameters between production runs.
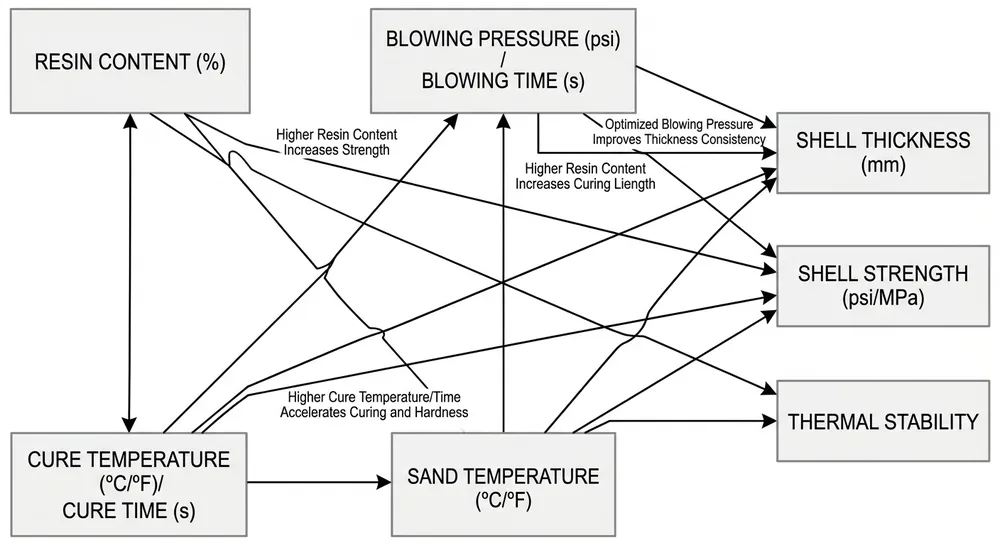
I've commissioned coated sand lines for 15+ years at TZFoundry, and the thin-wall parameter question comes up on nearly every installation where the buyer plans to run automotive or electronics housings. The machine can handle it — but only if you adjust blowing pressure, cure temperature, resin content, and sand temperature as a coordinated system, not as isolated variables.
Why Standard Settings Fail Below 5mm Wall Thickness
Standard coated sand line parameters assume you're building shell thickness in the 8-12mm range to support typical gray iron or ductile iron castings with 6-10mm walls. The shell needs enough strength to survive handling, pouring, and shakeout — but it also needs to collapse cleanly after solidification so you're not chasing embedded sand in machined surfaces.
When you run those same parameters on a thin-wall core (3-5mm finished wall), two failure modes show up:
Shell too thick relative to casting wall: If your shell blowing cycle produces an 8mm shell around a 3mm core cavity, the metal has to displace a massive volume of sand during fill. That creates backpressure, incomplete fill, and cold shuts. Even if the casting fills, you're left with a thick shell that doesn't collapse properly during shakeout — hello, sand inclusions.
Shell too thin and thermally weak: Drop the blowing time to reduce shell thickness, and now you don't have enough resin-bonded sand structure to survive the thermal shock when 1400°C iron hits the shell surface. The shell cracks, metal penetrates the cracks, and you get surface defects or complete mold failure.
The balance point is narrow. For a 3mm wall aluminum casting, you might need a 4-5mm shell with 2.0-2.2% resin content and a 15-second cure at 240°C. For an 8mm wall ductile iron part, you're looking at 7-8mm shell, 1.6-1.8% resin, and 25-second cure at 220°C. Those aren't tweaks — they're different operating regimes.
Machine Parameters That Control Thin-Wall Shell Quality
Your coated sand line has four parameter groups that interact to determine shell strength, thickness, and thermal stability. Adjust them in sequence, not all at once.
Resin Content (Binder Percentage)
This is the first variable to set because it determines how much structural strength your shell has per millimeter of thickness. Standard coated sand runs 1.5-1.8% phenolic resin by weight. For thin-wall work, you're typically increasing this to 1.8-2.2% to compensate for reduced shell thickness.
Higher resin content gives you more bond strength per unit volume, so a thinner shell can still survive handling and pouring. But past 2.2%, you start seeing two problems: the shell becomes too rigid and doesn't collapse cleanly during shakeout (raising your sand reclamation cost), and your resin cost per ton of sand goes up 20-30%.
The practical range:
- 3mm walls: 2.0-2.2% resin
- 5mm walls: 1.8-2.0% resin
- 8mm walls: 1.6-1.8% resin
If your mixer doesn't have automated dosing with ±0.1% accuracy, thin-wall work gets inconsistent fast. We added closed-loop dosing to our lines in 2018 specifically because export buyers were running more thin-wall jobs and manual resin addition was producing ±0.3% variation — enough to cause random shell failures.
Blowing Pressure and Cycle Time
Blowing pressure (typically 0.4-0.6 MPa) and cycle time (8-20 seconds) together control shell thickness. Higher pressure or longer cycle = thicker shell. For thin-wall cores, you're usually reducing cycle time rather than dropping pressure, because low pressure produces uneven sand packing and weak spots.
Standard 8-12mm shell: 0.5 MPa, 15-18 seconds Thin-wall 4-6mm shell: 0.5 MPa, 10-12 seconds
The mistake I see: operators drop both pressure and time trying to get a thinner shell quickly. That gives you a thin shell with voids and inconsistent density. Keep pressure in the 0.45-0.55 MPa range and adjust time only. If you need to go below 10 seconds, you're better off redesigning the core box venting — the shell won't pack uniformly at short cycles without proper air escape.
Cure Temperature and Time
Phenolic resin cures through a heat-activated cross-linking reaction. Standard cure is 200-220°C for 20-30 seconds. For thin-wall shells, you're often raising temperature to 230-250°C and shortening time to 12-18 seconds.
Why? A thinner shell has less thermal mass, so it reaches cure temperature faster. If you run the standard 25-second cycle, you're over-curing the shell — it becomes brittle and cracks during ejection or thermal shock. Raise the temperature and shorten the time to get full cure without over-baking.
The balance:
- Under-cured: shell is weak, collapses during handling or pouring
- Properly cured: shell survives pouring, collapses cleanly during shakeout
- Over-cured: shell is brittle, cracks during ejection or thermal shock, doesn't collapse during shakeout
You'll know you're over-curing if shells are coming out of the core box with hairline cracks before you even pour metal. Drop cure time by 3-5 seconds and test again.
Sand Temperature
Coated sand storage temperature affects how the resin behaves during blowing and curing. Most lines store sand at 20-25°C. For thin-wall work, some foundries pre-heat sand to 35-40°C to improve resin flow during blowing, which helps you get uniform shell density at shorter cycle times.
We don't recommend going above 40°C storage temperature — the resin starts to cure prematurely in the hopper, and you get clumping. If you're seeing inconsistent shell thickness across a production run, check your sand storage temperature. A 10°C swing between morning and afternoon shifts will change your shell properties enough to cause random failures.

Parameter Reference Table by Wall Thickness and Alloy Type
These ranges come from commissioning data across 40+ coated sand line installations. Treat them as starting points — your specific core geometry, gating design, and pouring temperature will shift the optimal settings by 5-10%.
| Wall Thickness | Alloy Type | Shell Thickness | Resin % | Blowing (MPa / sec) | Cure (°C / sec) | Sand Temp |
|---|---|---|---|---|---|---|
| 3mm | Aluminum | 4-5mm | 2.0-2.2% | 0.50 / 10-12 | 240-250 / 12-15 | 35-40°C |
| 3mm | Gray Iron | 5-6mm | 2.1-2.3% | 0.52 / 12-14 | 230-240 / 15-18 | 30-35°C |
| 5mm | Aluminum | 5-6mm | 1.8-2.0% | 0.50 / 12-14 | 230-240 / 15-18 | 30-35°C |
| 5mm | Gray Iron | 6-7mm | 1.9-2.1% | 0.50 / 14-16 | 220-230 / 18-22 | 25-30°C |
| 5mm | Ductile Iron | 6-7mm | 2.0-2.2% | 0.52 / 14-16 | 220-230 / 20-24 | 25-30°C |
| 8mm | Aluminum | 6-7mm | 1.6-1.8% | 0.50 / 14-16 | 220-230 / 18-22 | 25-30°C |
| 8mm | Gray Iron | 7-8mm | 1.7-1.9% | 0.50 / 16-18 | 210-220 / 22-26 | 20-25°C |
| 8mm | Ductile Iron | 8-9mm | 1.8-2.0% | 0.52 / 16-18 | 210-220 / 24-28 | 20-25°C |
Alloy-specific notes:
Aluminum (660°C pouring temp) has lower thermal shock than iron, so you can run slightly thinner shells. The main risk is metal penetration if the shell has any voids — aluminum's low viscosity finds every weak spot.
Gray iron (1400°C) requires higher resin content than aluminum at the same wall thickness because the thermal shock is severe. The shell surface sees a 1200°C temperature jump in under 2 seconds.
Ductile iron (1450-1500°C) is the most demanding. Higher pouring temperature plus longer solidification time (compared to gray iron) means the shell has to survive thermal stress for 30-60 seconds longer. That's why you see 0.1-0.2% higher resin content in the ductile iron rows.
Common Thin-Wall Defects and Which Setting to Adjust
When thin-wall castings fail, the defect type tells you which parameter is out of range. Here's the troubleshooting map we use during commissioning:
| Defect | Likely Cause | Parameter Adjustment |
|---|---|---|
| Sand inclusion (embedded in casting surface) | Shell too thick, didn't collapse during shakeout | Reduce blowing time by 2-3 seconds OR reduce resin content by 0.1-0.2% |
| Shell cracking before pouring | Over-cured or too brittle | Reduce cure time by 3-5 seconds OR lower cure temperature by 10°C |
| Shell cracking during pouring | Under-cured or insufficient resin | Increase cure time by 3-5 seconds OR increase resin content by 0.1-0.2% |
| Incomplete fill / cold shut | Shell too thick, restricting metal flow | Reduce blowing time by 2-3 seconds |
| Metal penetration / rough surface | Shell too porous or weak | Increase blowing pressure by 0.02-0.03 MPa OR increase resin content by 0.1% |
| Shell won't eject from core box | Over-cured, bonded to tooling | Reduce cure time by 5 seconds OR lower cure temperature by 10-15°C |
| Inconsistent shell thickness across run | Sand temperature variation | Check sand storage temp — target ±3°C stability across shift |
The most common mistake: changing multiple parameters at once. If you're seeing sand inclusions, don't drop both blowing time and resin content in the same test run. Change one variable, run 10-20 pieces, measure the result. Thin-wall parameter optimization takes 2-3 days of methodical testing, not 2 hours of guessing.
Sand Reclamation Considerations for High-Resin Thin-Wall Work
When you raise resin content from 1.6% to 2.2% for thin-wall jobs, your sand reclamation system has to work harder. More resin means more organic binder to burn off (thermal reclamation) or more film to scrub away (mechanical reclamation).
Thermal reclamation (our most common export configuration): the sand goes through a fluidized bed at 650-750°C to burn off resin residue. At 2.2% resin, you're burning 22 kg of organic material per ton of sand instead of 16 kg. That's 35% more fuel cost and 35% more exhaust gas to handle. If your reclamation line was sized for 1.5-1.8% resin work, running sustained thin-wall production at 2.0-2.2% will drop your throughput by 15-20% because the residence time in the fluidized bed has to increase.
Mechanical reclamation (attrition scrubbing): less common for phenolic-coated sand, but if you're running it, expect higher wear on scrubber media. The cured phenolic film is harder at higher resin percentages, so you're grinding more aggressively to get back to clean sand. We've seen scrubber liner replacement intervals drop from 8 months to 5-6 months on lines running sustained high-resin thin-wall work.
Recovery rate impact: Standard coated sand reclamation hits 92-95% recovery (meaning 5-8% of your sand is lost to dust collection and fines removal). At higher resin content, that drops to 88-92% because you're generating more fines during reclamation. On a 50-ton-per-day operation, that's an extra 2-4 tons of fresh sand makeup per day — factor that into your thin-wall job costing.
If you're planning to run thin-wall work as more than 20% of your production volume, talk to your reclamation equipment supplier about uprating the system. It's usually a matter of adding residence time (for thermal) or a second-stage scrubber (for mechanical), not replacing the whole line.

Pre-Production Checklist for Thin-Wall Casting Runs
Before you commit to a thin-wall production run, validate these items. Catching a parameter mismatch during setup saves you from scrapping 200 pieces halfway through the job.
1. Core box venting check Thin-wall cores need faster air evacuation during blowing. If your core box was designed for standard 8-12mm shells, the vent holes might be undersized for 10-12 second blow cycles. Look for: vent hole diameter 3-4mm minimum, vent spacing every 80-100mm around the core box perimeter. If you're getting uneven shell thickness or voids, add vents before adjusting machine parameters.
2. Resin batch consistency verification Pull a 5kg sample from your coated sand hopper and run a loss-on-ignition test (burn off the resin at 650°C, weigh the residue). Your target resin percentage should be within ±0.1% of spec. If you're seeing ±0.3% variation, your mixer calibration is off — fix that before running thin-wall work, because 0.3% resin swing will give you random shell failures.
3. Cure oven temperature profile Don't trust the oven setpoint display. Use a thermocouple probe to measure actual core box surface temperature at three points (gate end, middle, far end). You want ±5°C uniformity. If one end of the core box is running 15°C cooler, that section will under-cure and you'll get inconsistent shell strength across the core.
4. Sand storage temperature stability Check your sand hopper temperature at start of shift, mid-shift, and end of shift. If you're seeing more than ±5°C swing, you need better insulation or climate control in your sand storage area. Temperature swings cause resin viscosity changes, which show up as shell thickness variation.
5. Blowing pressure gauge calibration Verify your blowing pressure gauge against a reference gauge. We've commissioned lines where the installed gauge was reading 0.50 MPa but actual pressure was 0.43 MPa — that's enough error to cause thin-wall shell failures. Calibrate annually minimum, quarterly if you're running high-volume thin-wall production.
6. Test run with scrap pattern If possible, run your first thin-wall parameter test on a scrap core box or a simplified test pattern before committing your production tooling. This lets you iterate on blowing time, cure time, and resin content without risking damage to expensive production core boxes.
7. Pouring temperature verification Thin-wall castings are more sensitive to pouring temperature variation than thick-section work. A 30°C drop in pouring temp (say, 1420°C instead of 1450°C for ductile iron) can turn a marginal shell into a failed shell because the metal freezes before the shell has time to thermally stabilize. Use a calibrated immersion thermocouple, not a handheld pyrometer — you need ±10°C accuracy.
When to Upgrade Your Coated Sand Production Line
Sometimes the issue isn't parameters — it's that your current equipment can't reliably produce thin-wall shells. Here are the signs your line needs an upgrade or retrofit:
Blowing cycle can't go below 12 seconds: Older core shooters with manual air valves can't achieve the fast, precise blow cycles needed for thin-wall work. If your shortest stable cycle is 12-14 seconds and you need 8-10 seconds for a 3mm wall job, you need a PLC-controlled shooter with proportional air valves. We started offering this as standard in 2016 — older lines can be retrofitted with a control system upgrade.
Resin dosing accuracy worse than ±0.2%: Manual resin addition or volumetric dosing (measuring resin by volume instead of weight) won't hold the tight tolerances thin-wall work requires. You need gravimetric dosing with closed-loop feedback. If your current mixer can't hit ±0.1% resin accuracy, budget for a dosing system upgrade — it's a $15,000-25,000 retrofit depending on mixer size, and it pays back in 6-12 months through reduced resin waste and lower reject rates.
Cure oven temperature uniformity worse than ±10°C: If your core boxes are seeing 20-30°C temperature variation from one end to the other, you're fighting the equipment, not the parameters. Older resistance-heated ovens have hot spots. Modern ovens use forced convection with multiple heating zones to maintain ±5°C uniformity. This is usually a full oven replacement, not a retrofit — figure $40,000-60,000 for a 4-station oven.
No remote parameter adjustment: If you have to physically walk to each machine and turn dials to change blowing time or cure temperature, you're losing 30-45 minutes per parameter iteration during thin-wall setup. PLC-controlled lines let you adjust all parameters from a central HMI touchscreen and log every change with timestamp. When you're optimizing thin-wall parameters, that logging capability is critical — you need to know exactly what settings produced which results. We added remote diagnostics to our lines in 2019, so buyers can pull parameter logs and send them to us for troubleshooting without flying an engineer to the site.
Sand reclamation system can't handle >2.0% resin: If your reclamation line was sized for 1.5-1.7% resin work and you're planning sustained thin-wall production at 2.0-2.2% resin, the system will bottleneck. You'll either need to add a second-stage thermal processor (for fluidized bed systems) or uprate your scrubber capacity (for mechanical systems). This is usually a $30,000-50,000 addition, but it's cheaper than buying fresh sand at $80-120/ton to make up for poor recovery rates.
If you're seeing two or more of these limitations, you're better off upgrading the line than trying to force thin-wall production on equipment that wasn't designed for it. A partial retrofit (PLC controls + dosing system upgrade) runs $40,000-70,000 and gets you 80% of the way there. A full line replacement is $200,000-350,000 depending on capacity, but it opens up the entire thin-wall market segment for your foundry.
Moving Forward with Thin-Wall Coated Sand Casting
Thin-wall casting isn't a different process — it's the same coated sand line running in a different parameter regime. The machine can do it, but only if you treat resin content, blowing cycle, cure settings, and sand temperature as a coordinated system. Change one variable at a time, log your results, and give yourself 2-3 days of methodical testing before committing to production.
The most expensive mistake is assuming your standard 8-12mm shell parameters will work at 3-5mm wall thickness. They won't. The second most expensive mistake is changing all four parameter groups at once and losing track of what actually fixed the problem.
Start with the parameter table in this guide as your baseline, adjust for your specific alloy and core geometry, and validate with a test run before you commit tooling and production schedules. If your current line can't hold the required parameter tolerances, the upgrade cost is real — but so is the market opportunity in automotive, electronics, and aerospace thin-wall casting work.
For more information on Coated Sand Casting Production Line equipment specifications and commissioning support, or to discuss parameter optimization for your specific thin-wall casting requirements, visit our Resin Sand Production Line category. If you're evaluating whether your current equipment can handle thin-wall work or need a technical consultation on line upgrades, request a quote with your casting geometry and target wall thickness — our engineering team will recommend the right equipment configuration and parameter starting points for your application.

Liu Haoran is the Resin Sand Production Line Technical Manager at TZFoundry. Over 11 years of hands-on work with furan, phenolic, and coated sand systems, he has commissioned 40+ resin sand lines for export buyers and developed binder dosing protocols...